Visual Regression Testing in Capybara
An interesting topic that is picking up traction with many front-end UI engineers is visual regression testing. Visual regression testing relies on known visual state, which enforces that the application has not visually changed between code changes. Our QA and UI engineering team at SalesLoft recently began to discuss their desire to try this out; I want to share our first iteration.
Visual Regression Test Requirements
I’ve put together a conservative list of requirements for visual testing that came to my mind:
- Visual state is accessible to everyone with code access
- Visual state history is tracked and managed
- Any engineer can update the known visual state, documenting the previous and new state
- Changes in an unrelated part of the screen won’t fail tests
- Changes in the related part of the screen will fail tests
- Failures should record with a visual diff indicating what failed
Many of these requirements are satisfied by some form of VCS, git for us at SalesLoft. The rest must be implemented in code.
Capybara
Capybara is the perfect tool for QA teams. Tests can be written against the entire stack and re-run in a predictable manner. There is a bit of leg-work here, and the speed of them makes Capybara undesirable for normal CI processes. However, having Capybara setup makes the screenshot diff process near trivial, due to the page.save_screenshot method that Capybara exposes.
Setting up Capybara is beyond the scope of this post, so I’ll assume that you are at the point where page.save_screenshot works for you, and your tests are runnable.
Screenshot Process
Taking a screenshot with page.save_screenshot works well, but misses the requirement of unrelated screen changes failing tests. The current way that I get around this is by cropping the screenshot to the dimensions of a unique selector on the page.
image = page.save_screenshot(image_path)
cropped_image = Magick::Image.read(image)[0].crop(
  location.x - padding/2,
  location.y - padding/2,
  size.width + padding,
  size.height + padding
)
The padding allows for a little bit of context on the page (where is this element?), but could be removed to have the exact dimensions of the element.
ImageMagick (RMagick)
ImageMagick provides a great image comparison algorithm which will provide the number of pixels changed and an image containing all changed components in bright red. It’s also perceptively fast for what it is doing.
diff_image, pixels_changed = existing_image.
  compare_channel(image, Magick::AbsoluteErrorMetric)
Putting it Together
Putting together screenshot and diff capabilities gives everything needed to write visual regression tests. The interface that I’ve been working for now looks like this:
ensure_pixel_perfection.
  of("some visual element").
  using("#my-unique-selector").
  retina.
  call
This will provide a file called fixtures/some-visual-element.png which gets created when the file doesn’t exist, and diff’d when it does exist. We commit this file to git and then update it when things change.
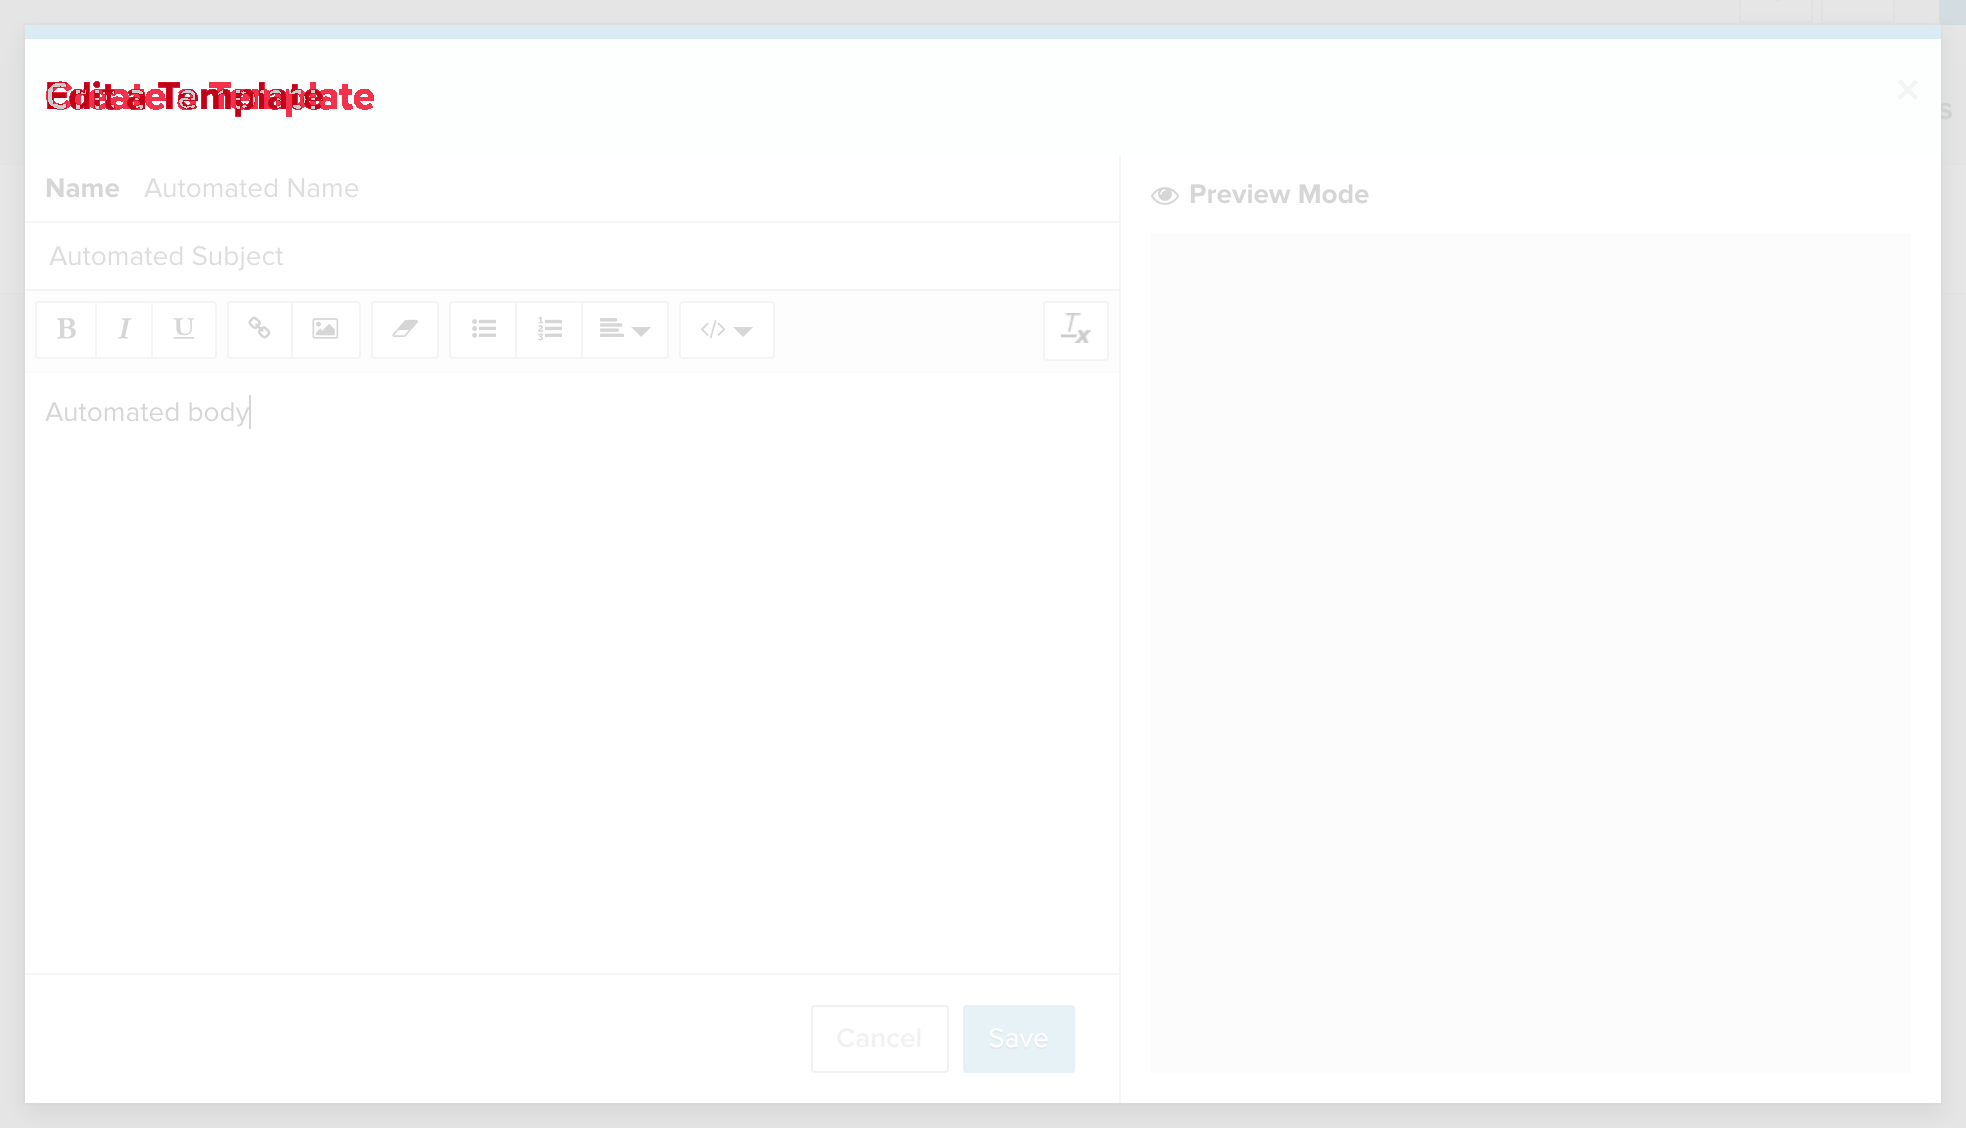 A visual diff from SalesLoft Cadence where “Edit a Template” has been changed to “Create a Template”
The Code
I can’t promise support for your codebase, so I have chosen to not gemify this code. I’ve put it up as a gist instead. Note that this requires Rails, Capybara, and RMagick gems. You could adapt it to not be Rails dependent, if you are on something else.